Craft procrastination = Procraftination
Except for the crochet blanket that I started at the weekend, I’ve not done anything crafty for ages. And I’ve not finished anything for even longer – probably my water flask holder in September. I’ve had writer’s block for crafting.
To combat this, I’ve come up with a procraftination project for myself: 15 super quick projects to beat the meh.
The criteria I’ve set down for myself is:
- They must not take more than a couple of hours each in total from start to finish
- They must cover a range of skills/techniques because I heart variety
- They must be do-able from the sofa because I’m lazy and there is often a dog, cat & blanket on the sofa and I like spending time with all three.
Most of them are also practical or upcycling/revamping something I’ve already got but that’s more of a coincidence than something deliberate.
1. Make a new purse (crochet or sew)
2. Embroider fun retro designs onto some boring plain knickers
3. Crochet a bookmark/book thong
4. Revamp turquoise handbag – replace white leather strip with copper wire
5. Remake/revamp my dangly button earrings
6. An hour of drawing
7. Finish sewing the dot-to-dot patterns I bought ages ago from Leethal FINISHED!
8. Crochet some mini storage baskets
9. Knit the ribbed hat I saw on CRAFTzine a few months ago
10. Make a pot holder/oven mitt thing
11. Upcycle/lengthen my stripey polo shirt that’s been in my sewing pile for months
12. Crochet some butterflies
13. Make some more wire bugs
14. Spin some more yarn
15. Make new black bead earrings based on necklace pattern
This post is more for me as a to-do list than for everyone else – but if anyone has any other suggestions of things I can add to my list, let me know!
Read MoreMy Really Good Goals for 2011
 I have set myself a list of goals for the year ahead – written up on my personal blog because they’re not all simple/DIY living related.
I did the same last year and found it useful – even if I did pretty much mentally abandon some mid-year. The most useful ones that weren’t a specific tick-off-done goal but one’s that helped shape my whole life – for example, I had a goal of “make a meal entirely out of things I’ve grown, raised, caught or killed” and in order to achieve that, I grew veg & herbs, raised chickens for the eggs and foraged for wild food.
My list is very simple/DIY living heavy this year! Here are the relevant ones:
- Increase the food output from our garden and cook a meal using things I’ve grown/raised/caught/killed completely off-grid
- Learn how to successfully take and propagate cuttings from every applicable type of perennial plant/shrub in the house/garden
- Make a piece of furniture for the house (woodworking)
- Make an entire outfit (to include conquering sewing patterns)
- Go fishing in the North Sea
- Buy no more than 12 items of clothing across the year*
- Specific food makery and/or eatery (because if I did them all separately it would take up half the list)
- Bake at least once a week
- Grow a sourdough starter and make bread from it
- Make a hard cheese
- Try ten vegetables (or veggie wild foods) that I’ve not tried before
- Build a cold smoking cabinet, try cold smoking more stuff & try hot smoking too
- Participate more in the real world – engage more with our local community and meet some internet people in real life
(* I’m going to explain this more fully tomorrow)
There were a few things I also really, really want to try but I didn’t think warranted goal status on that limited list:
- Keep records to track our usage of consumables – I mean, I want to know how many toilet rolls we use in a month, how much soap, how long it takes for us to get through a 10kg bag of rice etc. I might record absolutely everything we use for a month or so, and use that hardcore exercise to decide what is worth tracking longer term
- Have regular “eat only from the pantry & garden” weeks in the spring/summer, probably once a month
- Have more conscious “no spend” periods – minimum fortnights, possibly months, throughout the year
- Find a solution to the dog poo problem – something more useful than a cork up Lily-dog’s bum. Probably a dedicated wormery. Collect and store more rainwater for use on the garden – we can’t use the main gutter at the back for rainwater but could still collect off the greenhouse, from a gutter at the front and possibly off the extension area too. To be explored and implemented.
- Make my own soap – something that’s been nagging at me for a little while
- Make my own vinegar – for some reason, I have a really strong desire to make pineapple vinegar (probably the efficiency of using up the scraps)
- UPDATED TO ADD: Make conscious efforts to reduce food waste at home – probably a period of monitoring it closely to see what we throw out (which I’ll post on here) as well as better menu planning.
It seems like 2011 will be a busy one!
I’m hoping that the last goal – getting to know more people locally and meeting internet buddies in real life – will help me meet some of my other goals — I’d love to find mentors for some of my learning-new-skills goals. If you fancy mentoring me, let me know! :)
What have you got planned for 2011?
Read More2010 – A Really Good Year
Everyone else is doing end-of-year round-ups and it’s inspired me to do one too. Feel free to skip if you don’t like introspection ;)
While my life as a whole has been up and down (mostly up but some deep downs), 2010 has been a fantastic year from a simple/DIY living point of view.
Growing
Our first growing season in our new house, this year was one of experimentation. We had fresh produce from the garden from March through to October – and have a cupboard full of preserved goodies as well as potatoes in store. I’ve written about our growing successes and failures before – our overall output was disappointing but my, my, I learned so much. I’m pretty jazzed by the potential of what we can achieve now we know more about the conditions etc.

Chickens
Our first four chickens arrived in June and we got another four (which soon depleted to three) in November. They’ve been ace!
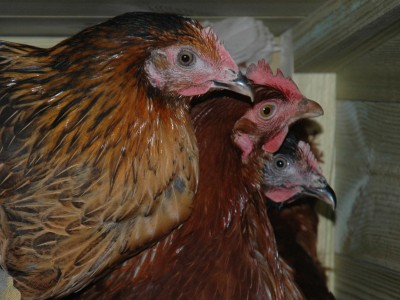
They’re a lot of fun – such personalities! – and the egg output has been awesome. From the day they arrived in June until the middle of December, the first four provided about 3.6 eggs a day (ie, most days one each but sometimes just three between the four of them) – they’re still laying now just less than that (especially as one has entered an early moult). The new girls have yet to start laying but hopefully they’ll start soon – and that’ll provide cover for when the rest of the originals going into moult.
Aside from the extra winter workload, I’ve been stunned by how little work they are – food & water are topped up once a day (they always have more than enough), quick visual inspection of the coop every day-ish (remove any giant piles of poo/top up straw & shavings as appropriate) and a full clean out once a week. It’s an hour a week in total, max. I do typically spend more time with them though – because as I said, they’re so much fun. Their arrival has been one of the highlights of 2010 for me.
Cooking
Read MoreChicken shelter from two old pallets
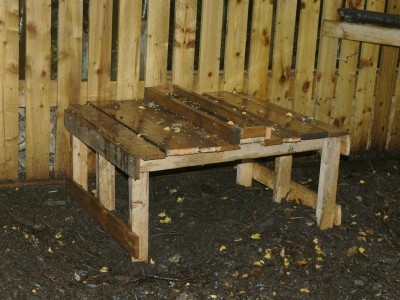
I finally built my long-awaited shelter for the chicken run on Saturday – hurrah! It will provide more stomping space (since they can stomp around underneath and on top), more shelter for the rain and somewhere sheltered to hang another drinker.
My original plan had been very fancy – involving a sloped solid platform (to be a shelter, with the water draining into a mini-gutter) topped with perches. The actual version is simpler – two small pallets (about half the size of normal pallet), one cut in half to be the legs, one left intact to be the platform, then finished off with scrap wood.
Since I was using already pretty solid pallets, it came together really quickly – three little bits of sawing (through the support struts of the pallet to be the legs) and a few screws, and I had a strong platform, which I could use as a work bench for cutting the scrap planks to size.
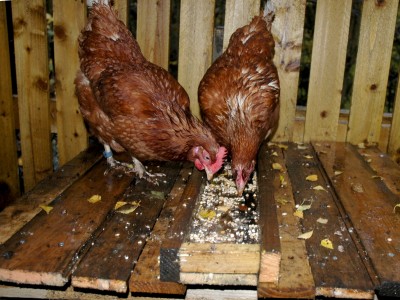
The raised bit in the middle has three purposes:
1) I couldn’t find any wood to fit the gap between the two middle slats – everything was either just too big or way too small – so I fitted a too-big piece across the top (it’s supported underneath by some little pieces on the support joists);
2) The raised sides are a bit narrow for the purpose really but could be perched on if a chicken felt that way inclined; and,
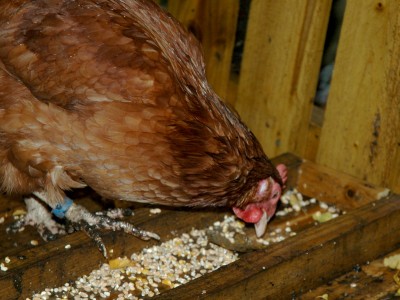
3) It gives a neat bribery trough for corn and similar treats.
It’s a little low really — they can get under there and stand up, but not stretch properly.
But I’m really glad I made this one – it showed me how easy it was and because it was smaller, it was easier for me to manage on my own without having resort to Long-Armed John’s assistance. It’s a useful prototype really – and aside from the cost of a few screws, completely free!
I’m going to make another version with two full sizes pallets next weekend – that should be more than tall enough for them. Once I’ve made that, I’m going to secure more perches going to and from the platforms and their existing perches so they can play “floor is hot lava” around the run :)
Read MoreUpcycle an old duvet cover into a frugal bean bag
(Is it just me or does “frugal bean bag” sound like a filthy euphemism? … It’s just me, isn’t it?)
As I mentioned in passing last week during my quick week-off updates, I made a bean bag from some old bedding.
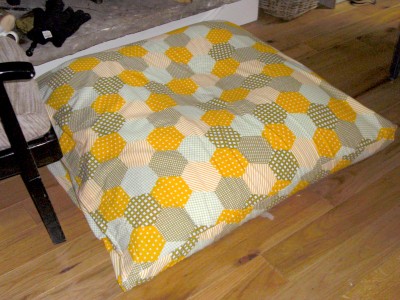
We wanted a fairly sizeable beanbag for the animals to sit on in front of the stove in the office. We wanted one that could be a flat mattress (since that would suit the dog best) but also be pulled up on its side to be a taller seat for us when we needed extra seating. I also wanted one that had an inner liner and a washable cover because, well, everything has to be machine washable in this house.
Perhaps I was looking in the wrong places but my my, big beanbags with liners are expensive! In shops, they were either tiny, unlined or unwashable pleather/suede, or all three. On one website, which was recommended by a friend, it was looking like I’d have to pay about £80 for a beanbag to match my wants – £80! For a bean bag!! GAH!!! So I decided to make my own.
It’s essentially a giant square cushion covered with a removable pillow slip case – but I’ve explained how I made it below.
Read More


