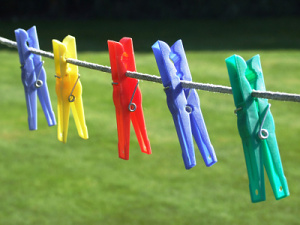
My top 5 clothes line drying tips
 Environmental blogger The Crunchy Chicken is having a line drying challenge for readers of her blog next month – getting people to give up their default use of clothes dryers and make them think about greener alternatives instead.
From both the green and frugal perspectives, I fully support the idea but think it’s a strange time of year to have the challenge – if the purpose is to convert new people to line drying, then now, when it’s getting colder and damper, is not the time to do it. It’s a hard time to line dry. But I guess that is part of Crunchy’s challenge – anyone can line dry in summer, it’s easy to convert people to line drying in summer but if you can show people how line drying is possible all year around, it’ll be more sustainable – not just fair-weather converts.
Here are my top five clothes line drying tips:
1. Find the clothes drying rack/airer that’s right for your home & garden
This feels like a bit of an obvious point but there is a lot of variety. Think about what you’ll use it for most and how you’ll use it rather than buying the first one you see.
Our last house was very short on floor space so we had a ceiling-mounted rack that could be raised or lowered. Here, we’ve got more space but only heat the rooms we’re in so an easily portable airer is better (those vertical concertina style ones fold up and can be carried even when stack with clothes). Radiator ones can be a useful, neat overflow but be careful not to use them for bulky items – it reduces the air flow too much for the middle rows to dry.
Outside, rotary ones give a lot of hanging space and can be folded away easily and quickly. However, they’re awkward to use for bedsheets and other big items – a basic line is better for those (you can get retractable lines too, so they can be folded away easily as well).
And if you live in an area which is frequently showery, you’d be best thinking of an outdoor line you can cover so you can make the most of the warm sunny bits in between the rain — rotary driers can be covered or you can buy ones that are essentially an airer in a tent.
Read MoreHow can you tell when something is good quality?
This is another cross-post between The Really Good Life and my recycling blog, How Can I Recycle This?
The first stage of the recycling triangle is Reduce – reduce the amount of things you buy/use and buy items that’ll last and can be repaired rather than ones that need replacing frequently. A key rule of frugal living is similar: don’t pay twice for something – a more expensive quality item might last two-three-four-times longer than the cheaper alternative.
But how can you tell when something is good quality – that it’s worth the extra money and it’ll last?
Back in the day, it used to be all about price – better quality items made with better quality materials cost more. But the rise of all powerful brands put an end to that. Now poor quality items made from poor quality materials command a huge price if they’ve got the right logo on them. And once respected brands have lowered their quality, or spun off lower quality ranges, without dropping their prices, hoping we won’t notice the difference. I’ve used a picture of clothes because the fashion mark-up is really obvious with them, but it’s an issue across the board: clothes, food, homewares, tools, electronics, cars, cleaning products…
Whenever we’re making major purchases, we look up reviews online/tap the expertise of friends on Twitter to ask their opinions but people have a habit of suggesting the thing they have/use rather than the best thing: partly because it’s often all they have experience of and partly because the more people who join them helps justify it’s their decision. Most people I know have their own area of expertise – for example, I know a lot of geeks and they know from painful experience what computers should be bought and what should be avoided like the plague – but outside their area of knowledge, they’re at a bit of a loss.
So how do you tell what’s good and what isn’t? What cues tell you when something is worth the extra money? And when it definitely isn’t?
Do you have a particular area of expertise? If so, tell us all about it!
Read MoreMaking our pets zero waste: the dog
A couple of weeks ago, I wrote about drying ox heart and other offal to make dog treats for our springer spaniel, Lily.
We adopted Lily from the Dogs Trust in March and she very quickly made herself a core member of the household – and here, that means being green and frugal :)
Food
As first time dog owners, we accepted the Dogs Trust’s recommendation of a certain type of dry food, with water – or whey or gravy, when they were available. Following feeding advice online, I tried feeding her veggies too – mixing them in with her food or giving them to her like a treat – she politely took them, because she’s a very polite well-mannered dog, but then gently dropped them to the floor and gave me a look. If you have animals/children/beloveds who you regularly try to deceive and betray by handing them a carrot when they expect beef, you know that look.
So, anyway, her food is very low waste: the dry food comes in giant paper sacks = recyclable. And because it’s biscuits, they don’t go off like meat does, so there is no food waste.
Read MoreUsing the last of everything: how do you do it?
This is cross-posted to my reusing & recycling blog, Recycle This, in its ‘Reduce This‘ category.
I’ve reached the end … of my shampoo bottle and our mayonnaise jar. And it made me wonder…
Every vaguely-frugal family has their own tricks for getting those last bits of gloop, sauce, oil or whatever out of jars and bottles – but what are your top tips?
Most bottles – from condiments to shampoo – are easily emptied by standing them upside down for a few hours.
Cooking sauces – jars/cans of tomatoes – are easy too: a little squish of water around to pull off the last of the sauce/juice then into the pan it goes to be reduced off.
Cooking oils bottles and jams & honey jars get left in a bowl of hot water to make the remaining contents a little runny and easier to pour out.
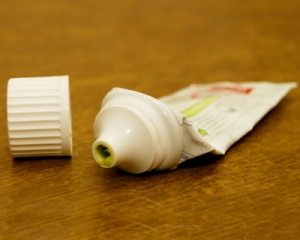
Metal squeezy tubes – like tomato puree and old school toothpaste – can be rolled up and squeezed, but the new plastic toothpaste tubes aren’t so rollable – cutting them open seems the only option.
What other methods do you use?
Read More


