Week off fun: apple pressing, egg pickling, bread baking & bean bag making
Hurrah! My week off has started well.
Last week was a busy one – working as usual during the day, then in the evenings, Tuesday through to Sunday, I was at Bingley Little Theatre for one reason or another (mostly rehearsals/show nights for the weekend’s studio productions). That ate into my fun making-and-doing time somewhat so I’m glad I’ve got the week off this week to catch up on fun stuff.
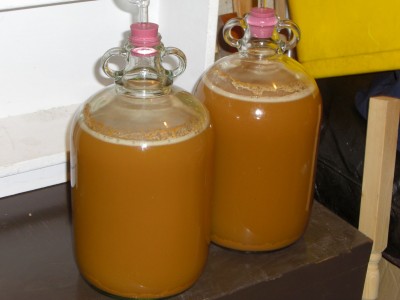
When I got back from the theatre at 10:30pm on Friday night, John had just started pressing some apples for cider. We had to give back the borrowed fruit press at lunchtime on Saturday so I was enlisted to help. We pressed until just after midnight then again for a couple of frantic hours on Saturday morning – got through about 40lbs of apples – about half-and-half from John’s Grandma’s apple tree and windfall from John B (who also provided the loan of the press). We’ve got 2 gallons of cider on the go now and there were a few litres left over which John’s drinking as juice.
Sunday was chore day – I cleaned out the chicken coop as normal and let the girls out into the wider (not fenced in) garden for the first time too. Lime and Blue were the only ones interested in exploring and they de-weeded/scratch-scratch peeked the bed nearest to their coop. I’ll definitely use them again for that before planting out time next year!
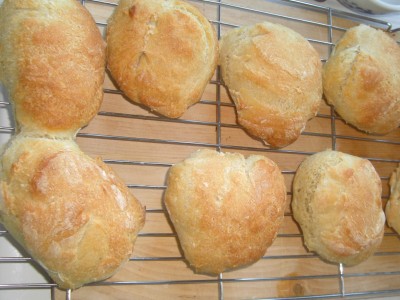
So to yesterday – my first full day off. It started slowly, stretched out in the sun with the animals and catching up on the weekend papers, but then I pickled some more eggs (this time it was garlic & pepper, recipe to follow) and tried a new bread recipe for the first time, a new dough recipe to make layered rolls. When I’m learning how to bake something new, I like to “grind” it – a video game term for doing a repetitive task over and over again to “level up” – so I’m going to make those at least every other day this week. Mmm, bread rolls.
Later on, after a walk with the Lily dog, I made a giant bean bag for said hound – using a very retro-cool single duvet cover I found in a charity shop in Guiseley on Saturday. It was easy to make but I’ll write a full how-to soon, mostly because I have several comedy photos of the cats and dog “helping”.
Today has had another slow start but I think it’ll continue with some soup making, maybe some biscuit baking, some jamming (since we did our once-every-six-weeks shop last night and had to pull some blackberries out of the freezer to make way for half price ice cream), and since my sewing machine is out, some more stitchery. Woo!
Read MoreBaking things that’ll last
I love baking bread, cakes and biscuits – the process is fun, the product is tasty and it’s very often cheaper than buying them ready-made from a supermarket. But I don’t have the time to bake every day at the moment – and that often results in having to buy expensive, pale imitations of nomminess, and sometimes food waste too.
Our slow rise bread is great – it’s edible as long as there is any to be eaten. Because it’s not quite so fluffy as supermarket bread, it doesn’t feel as instantly stale and it’s fine as fresh bread for three days or so, then good for toast for a couple more days. Other baked goods though – scones, cakes, biscuits – tend to be lovely on the first two days but then quickly stale – either going soggy or hard depending on which is undesirable in the item.
So what do you do to make sure your baked good will last until you can bake again?
Airtight containers (typically old ice cream tubs) don’t seem to help that much – perhaps with biscuits (cookies) I need something else in there to absorb the moisture… rice perhaps?
Freezing breads & cakes is a possibility – anyone got any preference to freezing them before or after baking (or part-baked)? I keep meaning to freeze homemade pizza dough – it can be frozen at any stage from after kneading or rising, through to full prepared pizza – does anyone have any preferences for freezing at any particular stage?
As for biscuits, I like the idea of making a roll of dough, which is then frozen and sliced & baked on demand (like for these Earl Grey tea thins) – but with all this breads, cakes and pizza dough, I suspect our freezer will quickly fill up! So what are your favourite longer-life biscuit tricks?
Any thoughts, recipes, suggestions etc would be gratefully received!
(Photo by hisks)
Read MoreBread baking – making efficient use of the oven
Following on from yesterday’s post about my love affair with slow rise/no knead bread, I’ve asked a question on Recycle This today about how to make better use of the oven while baking.
It uses a fair bit of energy (and therefore money) so I want to make sure the process is as efficient as possible.
If you’ve got any suggestions, go post a comment over there!
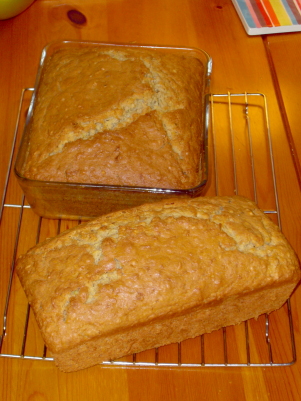
Read MoreThe wonder that is slow rise bread
Slow rise bread is awesome and here’s my top five reasons why.
1. Slow rise bread is really easy and, waiting aside, quick to make.
While it usually takes about 18 hours from start to finish so requires plenty of forethought if you want it for a particular meal, it only takes about 5-10 minutes of actual involvement and for me, most of that time is cleaning my mixing bowl because I’m too disorganised to do that in advance. That’s less time than it takes us to walk to the shop and back.
2. Slow rise bread tastes great.
The bread produced is not like the super fluffy, disturbingly even stuff from supermarkets; it’s heavier, chewier and the bubbles are bigger and more random. This makes it feel considerably more substantial and less like candy floss. You don’t need to eat as much to feel full.
3. Slow rise bread lasts longer than shop-bought bread.
Probably because of the heavier, chewier texture, it doesn’t feel stale anywhere near as fast as supermarket bread. Fresh-baked (rather than pre-packed) supermarket bread always seems to dry out really quickly and by the second day, needs heating in the oven/toasting to be enjoyable. Our slow rise bread is still good to eat on day three or four (although it rarely lasts that long). We waste far less bread/bread products these days.
4. Slow rise bread is cheap to make.
A loaf of the “fancy” stuff from the bread counter in a supermarket usually costs £1-ish — or more if you get their version of an artisan loaf. Even using reasonably fancy flour, my loaves cost about 30p (excluding energy for baking). I suspect I could push this down quite a lot by buying in bulk.
5. Slow rise bread saves money in other ways.
But more than just the cost of the loaf itself, we’ve saved loads of money not going to the supermarket every other day to pick up fresh bread. Because when we were there, we never just brought the bread – we’d pick up other bits and bobs, most of which were treats or other unnecessary purchases.
Easy, tasty & frugal – really, what more could you want from a loaf?
My No Knead, Slow Rise Bread Recipe
Using up the glut: Marrow cake recipe
In my previous post about saving marrow/courgette seeds, I mentioned that the marrow I had was just going from ripe to overripe. I had no particular plans to eat the marrow – we like courgettes a lot but thought, since the variety was billed as a courgette, it would be tasteless as a marrow. I was happy just using it as a seed nursery – but when I’d stripped out the seeds, it seemed a waste to throw it in the compost. If the chickens liked courgettes/marrows, I’d have given it to them but they’re strangely fussy birds so I was left with pounds and pounds of edible flesh.
I test fried a slice and judged it to be alright – not as flavourful as its younger siblings but certainly not bad. Tough skin though – edible but tough, so that had to go. I used half of it to make a cheesy-bacony comfort food bake thing (a variation on this recipe from the Indy but with mixed cheese – parmesan and jarlsberg – because that’s all we had in and also goats cheese makes me gip) – I had some on its own last night and we’ll have the rest tonight with pork chops in a tomatoey sauce. The other half, I used to make a marrow/courgette cake.
Marrow cake/courgette cake recipe
Ingredients
1 large egg (I used 2 medium ones since our girls aren’t laying truly large yet)
200g of caster sugar
100g of melted butter
1/2 tsp of vanilla extract
300g of courgette/marrow, coarse grated
300g of self-raising flour
75g of finely chopped nuts
1tsp of cinnamon
1tsp of baking powder


