My first soap
I made some soap for the first time last week. It took FOREVER to trace. I wrote a blog post about that but didn’t explain any more about my soap making because, well, frankly, at that point, it looked like it was going to be a big fat fail.
Even though it had reached what could be considered trace, it still felt very sloppy when I was pouring it into the moulds and even overnight and over the next night, it was harder but still very soft. The directions I’d read had said to take it out of the moulds after a couple of days – mine would have still blobbed all over the place at that point. But it clearly was still curing and it was more than ready to leave the moulds today – a week after it was made. (It was probably ready for tipping out by Wednesday – it was a lot paler and seemed like it would hold its shape – but I was just busy with other stuff so thought it would be better to leave it rather than rush it.)
I made two batches – I’ll post the recipes & cost breakdown once I know that it is actually a success and they’re good to use but for now, I’ll say the first was a 100% olive oil soap, and the second was a third olive oil and two-thirds other generic veg oils/shortening — everything bought from supermarkets. As I’ll explain more when I review the two soap-making books I bought, we’re pretty utilitarian when it comes to our soaps – we want them to get us clean, to not be harsh & drying, and to smell alright. We want them to create minimal waste & be as frugal as possible. This is particularly important for me while I’m learning the skills – if I make a mistake, it’s nothing more than a few quid and some time; if I was buying neem oil, shea butter and essential oils, I’d not only be paying more for the ingredients, I’d be paying for postage & packing too and having to wait for them to arrive too.
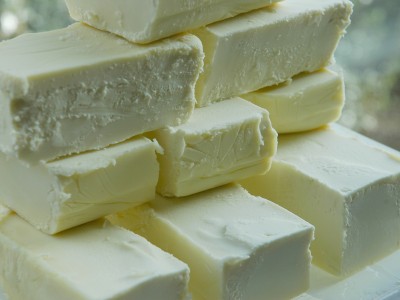
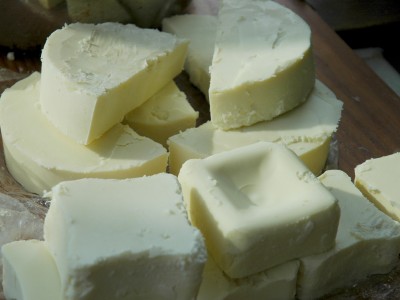
As expected, the 100% olive oil soap is considerably paler & already harder than the mixed oils one – the veg shortening keeps it that bit softer. Because I ended up making a lot more than I’d intended in one day, I had to get a bit more creative about the moulds than I thought I would at the start. The 100% soap used an old plastic fruit tray & an old deep oven tray as moulds.
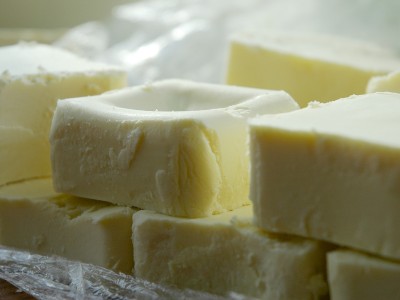
The mixed oil one got the choicest mould – a long flat tray with a lid (from when we bought a big pack of ostrich burgers from the farmers market) – but its overflow containers weren’t as suitable really – one of the square olive oil bottles and an ice cream bucket. They were more awkward to use but have resulted in interesting shaped soaps.
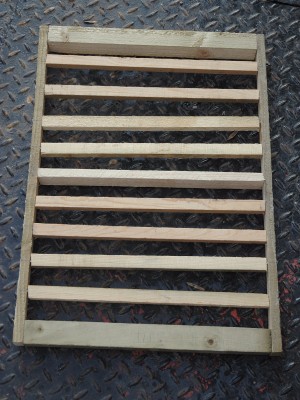
Once I’d popped everything out and cut it to size, I thought “I’ll put this in the airing cupboard to keep curing and drying for the next few weeks”. Then I had a “doh!” moment – the airing cupboard got pulled out by our bathroom refitters on Monday! I hadn’t acted quick enough to keep the racks I’d made which would have been perfect as drying racks (I did though save the cupboard doors – one of which I used as a chopping board for the soap, and the others will make a raised bed). So anyway, I needed something to use for drying racks so yet again, I raided the scrap wood store and twenty minutes later:
A drying rack! It’s a very rough & ready job, done without any measuring hence the slats being a bit wonky, but it’ll do fine for this purpose.
Now the soap is on the new rack drying in the attic room. I guess I shouldn’t declare it a resounding success just yet until it’s finished and we can try it, but after a few days of foreboding failure, it looks a lot more hopeful now!
Read MoreMy chicken keeping spreadsheet
I’ve had a number of visitors and a few emails from people asking about my “chicken keeping spreadsheet” which I thought was a bit weird because while I do have one, I haven’t really spoken about it (…have I?). I’m actually quite chuffed with my chicken spreadsheet though so inspired by Jono from RealMenSow‘s market price for homegrown veg spreadsheet, I thought I’d share my chicken one for those people who’re interested in it – and anyone else who may be now they know it exists :)
I’m a bit of a spreadsheet nerd. I like graphs. I like formulas. I like automatically inserted data. And my chicken-ing spreadsheet reflects this. If you like those things too, you can download it from here:
I made it in OpenOffice Calc but to “release” it here, I’ve converted the formulas so they’re Excel (and Google Docs) compatible. I *think* they work – although I’m not sure the graphs do. Do please shout if anything doesn’t work for you and I’ll try to fix it ASAP.
Column widths and heights are almost certain to need adjusting.
About my chicken spreadsheet
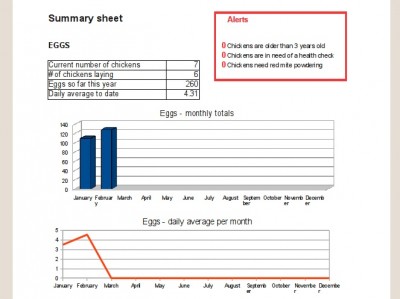
It’s evolved over the last eight months – it started as a simple one sheet list of expenditure but now it keeps all sorts of data in it – and does a lot of calculations to save my little brain from having to do any work. And also it has a useful summary sheet (seen in print preview above) and graphs in it. Mmm, graphs. It may have grown to be a bit overly complicated for some people’s liking but it works for a spreadsheet nerd like me :)
There is some dummy data in the spreadsheet templates above – based on my girls – just to show what it can do and the formats (for dates etc) needed to make it work. Possibly best to overwrite this (and for more rows, copy existing data then overwrite it) to preserve formulas (where applicable).
It’s focused around egg laying, because that’s what my chickens do. I could easily extend it to include details about meat chickens if we end up going that way – with nice alerts to tell me who is ready for the chop!
It’s designed for domestic chicken keepers – people with backyard hens for eggs & pleasure rather than business/profit. If we get around to selling any eggs at any point (we haven’t yet, we just give them away), then I’ll include a sales sheet. (If you would like that sheet added and can’t make it yourself, let me know and I’ll work it out. If you can make your own sales sheet for use in this overall spreadsheet, do share!)
It’s released under the Creative Commons Attribution-ShareAlike 2.0 license – ie, you’re free to download it, use it and modify it to your heart’s content but if you want to share it (whether in the original form or with your own additions included) with anyone else, you must share under the same licence and give me a credit.
Below, I’ve given lots of nerdy detail/info for using the spreadsheet including how to change various defaults and about ways I’d like to improve it. In case you’re interested/feeling nosey, my “live” chicken spreadsheet – with all the correct data in it up to today – is available here.
Read MoreChocolate Coffee Mousse recipe
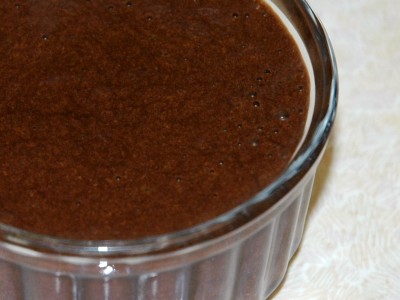
I stumbled upon this recipe a little while ago and it’s become a favourite in the Peach household – not only is it one of the nicest, richest desserts I’ve ever eaten, it both uses up eggs (a good thing!) and is really pretty easy & quick to make as well.
It’s easy because it cheats by starting with ready-made chocolate. I’ve tried making it with both fancy 70% chocolate and cheaper plain stuff (I mean really cheap plain stuff – Netto, two 200g bars for £1.50) – there is a difference, the former was obviously a lot stronger and richer, but you know what? the cheaper stuff did pretty well too. The intense strong chocolate is nice but can be a bit overwhelming – I’d certainly make it again with the cheaper stuff, especially if the people eating it weren’t major dark chocolate fans.
Regarding the coffee, John is a coffee snob so we have very good beans in the house pretty much all the time and he makes it using an Aeropress which apparently removes a lot of the bitterness (I don’t like to drink coffee but I like it as a flavour in cakes & desserts). Since it was being mixed with other things, he didn’t use his super expensive stuff but used a blend of “old” beans (admittedly no more than a few weeks old) to make the espresso. I dare say the fact it was good coffee to start with added to the flavour of the finished dessert.
Aside from that though, eggs is eggs, a little sugar is a little sugar. If the eggs are homegrown (as ours are), the only real cost is the chocolate, with an extra 20p or so for the fancy-smancy coffee. For a super rich dessert for four, I think it’s pretty reasonable.
Dark Chocolate Coffee Mousse recipe
Makes enough to fill four to five ramekins
Ingredients
200g of plain chocolate
3 tbsp of freshly made espresso/strong black coffee (or more/less to taste)
4 room temperature eggs
1-2tbsp of caster sugar, depending on how sweet the chocolate is


