A few days off
I’ve just had a few days offline to clear my head a bit – I spent a lot of time reading, resting & DSing so it wasn’t as productive as four days off work usually is, but there are a few things to report:
Massive egg update
The supersized chicken egg we got on Monday has been repeated on a few days this week – not a scientific test but definitely more likely to happen after they’ve had a good portion of green treats the day before. We’ve had a couple of them and they’ve been double yolkers – which is a worry as it hints that there is something wrong with the fine lady’s reproductive system (even though they’re still young, I think they’re a bit too old for it to be a “really young and still learning” quirk). Will keep an eye on the situation.
Foraging & fruiting
Took Lily-dog for a long walk around Otley Chevin on Saturday – found the most wild mushrooms I’ve seen in one place but unfortunately didn’t have our identification books with us, doh! Took lots of pictures for post-hoc identification – means we can’t forage them but the identification part is the more important bit at this stage in our learning really.
We also found the dregs of some wild raspberries – so ripe it was hard to pick them because they’d fall off as soon as we went nearly them.
Speaking of which, the bramble bushes in the woods next to our house are just about ready to give up their first glut – John had some as a pre-breakfast snack while dogwalking this morning and declared them delicious. Have to go picking soon.
Read MoreBread baking – making efficient use of the oven
Following on from yesterday’s post about my love affair with slow rise/no knead bread, I’ve asked a question on Recycle This today about how to make better use of the oven while baking.
It uses a fair bit of energy (and therefore money) so I want to make sure the process is as efficient as possible.
If you’ve got any suggestions, go post a comment over there!
Read MoreThe wonder that is slow rise bread
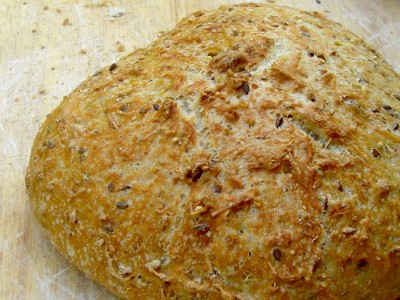
Slow rise bread is awesome and here’s my top five reasons why.
1. Slow rise bread is really easy and, waiting aside, quick to make.
While it usually takes about 18 hours from start to finish so requires plenty of forethought if you want it for a particular meal, it only takes about 5-10 minutes of actual involvement and for me, most of that time is cleaning my mixing bowl because I’m too disorganised to do that in advance. That’s less time than it takes us to walk to the shop and back.
2. Slow rise bread tastes great.
The bread produced is not like the super fluffy, disturbingly even stuff from supermarkets; it’s heavier, chewier and the bubbles are bigger and more random. This makes it feel considerably more substantial and less like candy floss. You don’t need to eat as much to feel full.
3. Slow rise bread lasts longer than shop-bought bread.
Probably because of the heavier, chewier texture, it doesn’t feel stale anywhere near as fast as supermarket bread. Fresh-baked (rather than pre-packed) supermarket bread always seems to dry out really quickly and by the second day, needs heating in the oven/toasting to be enjoyable. Our slow rise bread is still good to eat on day three or four (although it rarely lasts that long). We waste far less bread/bread products these days.
4. Slow rise bread is cheap to make.
A loaf of the “fancy” stuff from the bread counter in a supermarket usually costs £1-ish — or more if you get their version of an artisan loaf. Even using reasonably fancy flour, my loaves cost about 30p (excluding energy for baking). I suspect I could push this down quite a lot by buying in bulk.
5. Slow rise bread saves money in other ways.
But more than just the cost of the loaf itself, we’ve saved loads of money not going to the supermarket every other day to pick up fresh bread. Because when we were there, we never just brought the bread – we’d pick up other bits and bobs, most of which were treats or other unnecessary purchases.
Easy, tasty & frugal – really, what more could you want from a loaf?
My No Knead, Slow Rise Bread Recipe
Cold smoking cheese – taste testing the first batch
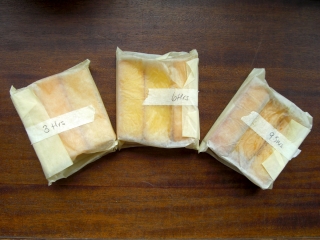
My last post about cold smoking cheese left off when the cheese was coming out of the smoker. All the guides I read recommended leaving it to rest for the flavours to develop – at an absolute minimum overnight but ideally a least a week. So I wrapped up the smokey sticks in parchment paper, labelled them and into the fridge they went.
Occasionally, we’d take the packages out & sniff them but it was only today that we got to open them & dig in.
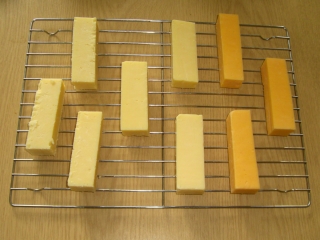
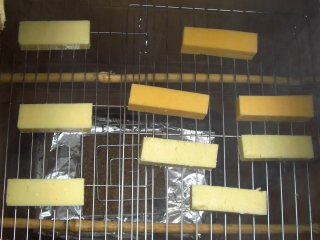
Let’s first remember what the cheeses looked like to start with. There was a Double Gloucester (the orange one), and two cheddars (a mature and extra mature).
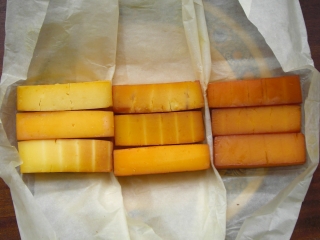
And after the smoking, they looked like this. The left most batch was in for 3hours, the middle for 6hours and the right batch for 9.5hours. Check out the colour difference!
And so to the taste test…
Read MoreBusy Sunday
Today, I’ve:
- Built a cold-smoking cabinet/mini-smoke house
- Cursed the sun because just as I finished the latter, it came out and made it too hot to cold smoke cheese without it melting all over the place
- Cleaned out the chicken coop
- Hung out a load of washing, which, of course, caused the sun to go in
- Jumped for joy because the lack of sun meant I could start smoking
- Started smoking three types of cheese (more on this in another post)
Smoked cheese – my first attempt at cold smoking
I’ve been intrigued by the idea of curing & smoking food for a while but I only started to seriously consider doing it when Martin from Old Sleningford Farm mentioned a) how cheap cheddar can be transformed by a little time in a smoker and b) how easy it is to build a garden smokehouse.
About a month ago, I decided it would be a perfect project for this year’s birthday new fun craft/experience/skill and started reading into it in more detail. It’s a lot easier to build a hot smoker and there were a number of smokers-cum-bbqs on eBay – but that wouldn’t let me do cheese, and I like smoked cheese a lot. I thought I’d have to build a smoker with an external firebox, feeding the cooling smoke into the chamber via piping – and the thought of that overwhelmed me a little. Then by complete chance, I stumbled upon the ProQ Cold Smoke Generator.
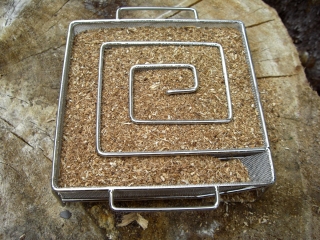
The ProQ Cold Smoke Generator was only developed last year but it’s a wonderful combination of simplicity & genius. Obviously I’m new to smoking so I can’t compare it to other methods – but every other method I’ve read about was way more complicated that this. It’s a carefully (but not overly) engineered spiral of metal mesh. It doesn’t use gas or electricity – just a few seconds of a tealight to get started, then the sawdust smoulders away of its own accord for up to 10hrs, without any further intervention, stoking or encouragement. I think what finally won me over though was the instructions on the ProQ/Mac’s BBQ site showing how, with the CSG, you could make a smokehouse from a cardboard box, two bits of dowel, an old baking tray and some cooling racks. Recycling and frugal!
Read More


